Table of Contents
Prerequisite for Homebridge with docker on Raspberry Pi
Prepare environment for Docker and docker-compose
In this article, we are going to set up a Homebridge server quickly on Raspberry Pi using Docker image. Our first prerequisite, of course, is the hardware. I am going to assume you have a Raspberry Pi, or some other Linux-based machine here. With that, we can set up our environment with docker-compose. Please follow the Prerequisite: install docker and docker-compose on raspberry pi section in this post, we will get the Docker environment ready.
Setting up Homebridge with docker-compose
Now that docker-compose is ready, the rest will be very simple. First, we will create the directory where we are going to hold the files:
mkdir homebridge
cd homebridge
Next, let’s create a docker-compose.yml in this directory. Let’s add the following content to it:
version: '2'
services:
  homebridge:
    image: oznu/homebridge:raspberry-pi
    container_name: homebridge
    restart: always
    network_mode: host
    environment:
      - TZ=America/Los_Angeles
      - PGID=1000
      - PUID=1000
      - HOMEBRIDGE_CONFIG_UI=1
      - HOMEBRIDGE_CONFIG_UI_PORT=8080
    volumes:
      - ./homebridge:/homebridge
The Docker image we are using is from here, in case you are interested in digging further into the details. Typically there is not much changes needed. If that’s the case for you, at this point we can already start the service.
docker-compose up -dThe GUI will start at port 8080. So now, open your browser and go to http://<Your_IP>:8080, enter the username and password, then we enter the management interface. Here you can start setting things up. The default username and password are admin and admin. Once you are in, you should see something like this:

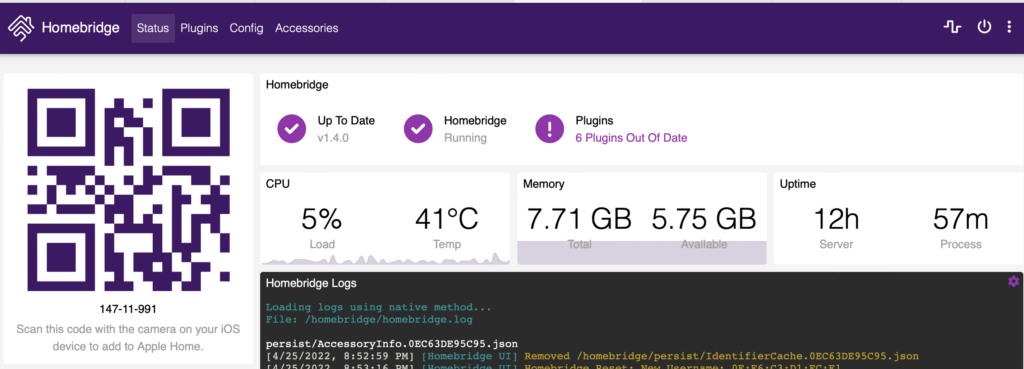
If you click on the 3 dots on the right, there are some settings to play with. I am going to leave it to you to decide what to do there, since it is a little different for everyone. Anyway, if you are not sure what you are doing, you don’t have to change anything for now. Let’s keep the settings as is and continue.
Installing plugin
The one thing I really like about Homebridge is it has a very easy to use GUI. We all have different kinds of accessories and it is easy for us to search the plugins for them. Click on the “Plugins” on the top, we can use the search box to find plugins for any products we have. For example, I was looking for a plugin for my TPLink switch.

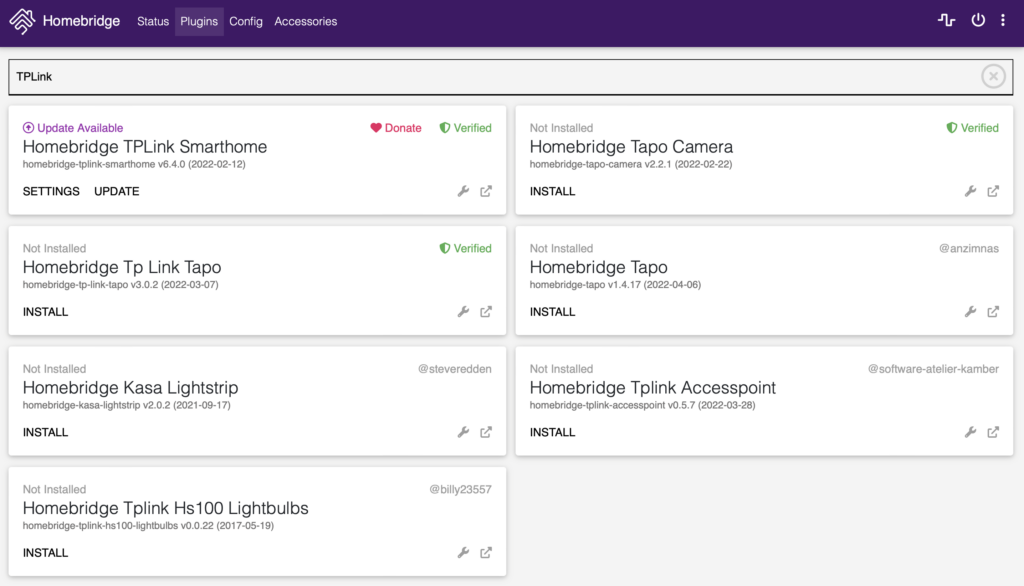
Once you find what you need, you can install it right here, and then follow the settings to set your stuffs up. Every plugin is a bit different, so sometimes it takes a bit trial and error. It is always good to go to the developer page to check out further instructions.
Connect to Apple Homekit
Back at the “Status”, there was a QR code. That is where we can add the Homebridge from Apple’s Home app. The steps are the following:
- Open the Home app on your phone (or iPad..)
- Add an accessory.
- The phone will ask you to scan the QR code. So scan it, wait, and then the bridge (and accessories connected via it) will be added.
Don’t forget to open the port in your firewall!
If you cannot add the accessory to HomeKit, there may be many reasons. But before you try to reset everything, please first check if you have enabled the port Homebridge is using in your Raspberry Pi’s firewall. You can find the port that needs to be enabled in “Config”. The default port seems to be 51860, but this may change.
Most likely if you have a firewall on Raspberry Pi, you are using ufw. I found DigitalOcean’s ufw essentials quite handy, in case you need some reference.
