This post is about how to make app icons for iOS apps.
If you are a developer and not a designer, it may be helpful to take free icon resources to start with. There are many free resources on the web. In this post I took an icon from the noun project as an example. At the end of this post you can find more resources in reference links. We can choose any icon we like, and I downloaded the png file.
Now, let’s look at how to use this icon as iOS app icons. Here we assume you already have an iOS app project. The icon needs to be added to <project_folder>/Assets.xcassets/AppIcon. Depending on the devices we are targeting, different sizes image files are needed for the icon. Navigating to Assets.xcassets/AppIcon under your project we see something like this:

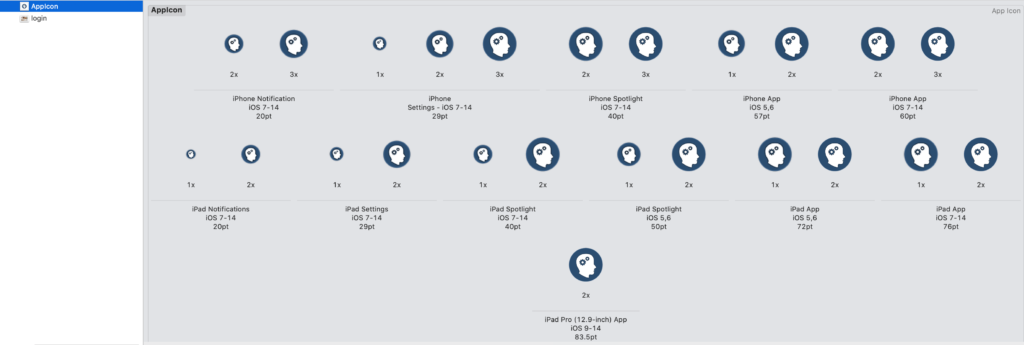
As we can see, there are quite a few files needed. One way to do this is to resize the icon image file to all the required dimensions and then add them one by one by drag-and-drop. Fortunately, there are also tools out there to help us do this. In this post I am using AppIcon. It takes the icon we upload and let us select which devices we are targeting, do all the resizing work for us, and let us download a zip file containing the AppIcon folder. This way all we need to do is to replace the AppIcon folder by the downloaded one. Once this is done, we can see in Xcode the icons as the screenshot above.
That is all we need for app icon. Now we compile and deploy the app, and we will see the app icon showing up on the device. One thing to note though, if you are using an icon image that has transparent background, the background will become black on the device. The best practice is to take a white, square background image file as icon.
References:
https://www.idownloadblog.com/2020/09/23/iphone-icon-packs-home-screen/